Configuring the Condition node
The view of the Condition node properties window depends on how many nodes are connected to it. If one node is connected, the window has the following tabs: Children, Condition, Dictionaries, and General.
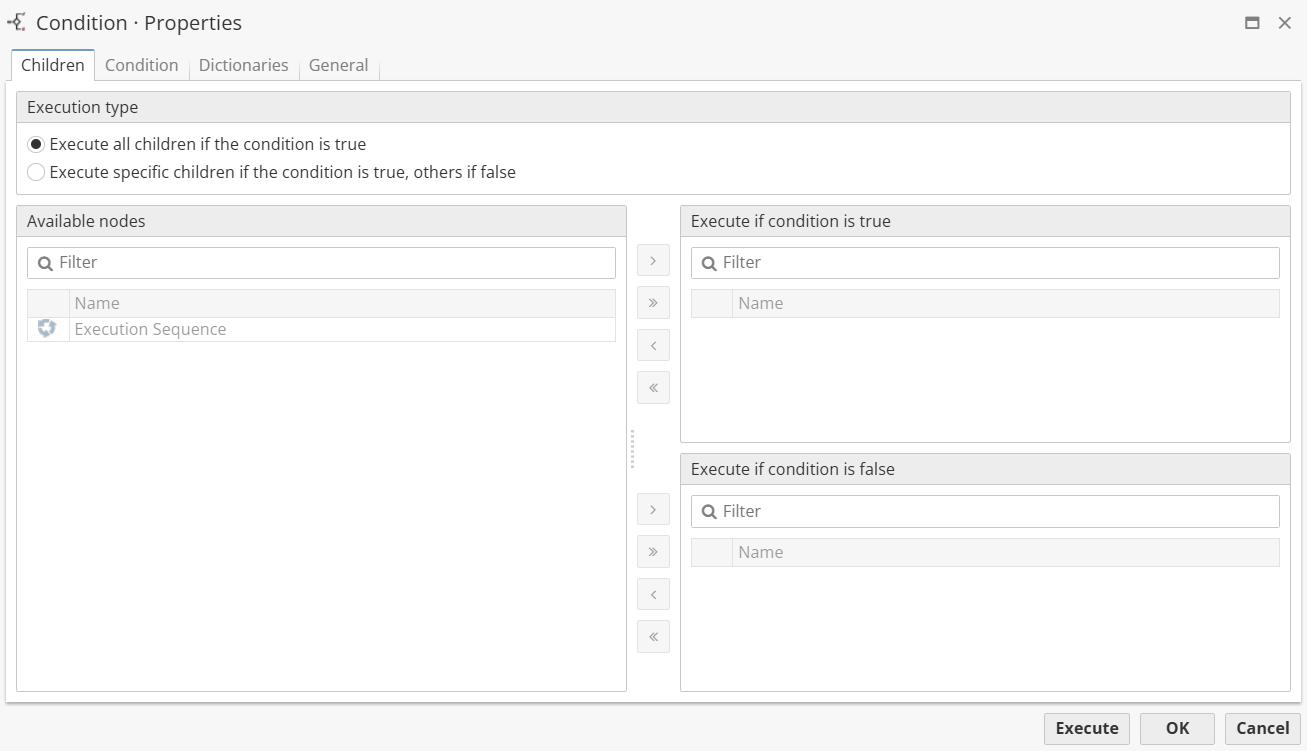
On the Children tab, select Execution type (the node’s action when the conditions specified on the Conditions tab are executed):
-
Execute all children if the condition is true – if the node is in this type, all child nodes will be executed if the condition is true, otherwise they will not.
-
Execute specific children if the condition is true, others if false – if the node is in this type, it will fail to execute child nodes that should not be executed and displays an error.
For the Execute specific children if the condition is true, others if false type, it is possible to select all available nodes in the Available nodes field and move them to two fields:
-
Execute if condition is true
-
Execute if condition is false
If several parent nodes are connected to the Condition node, the Parents tab will be displayed instead of the Children tab. The Parents tab displays all connected nodes:
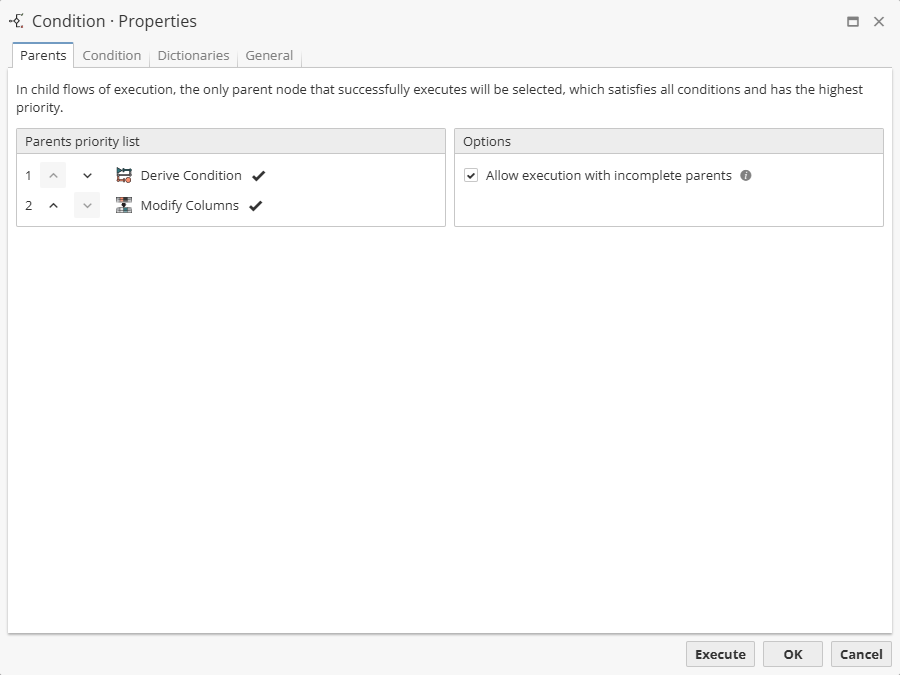
In the list on the left, set the priority of the parent nodes using the Move up/Move down buttons; 1 is the highest priority of node execution.
If necessary, enable the Allow execution with incomplete parents option, which allows you to continue executing child nodes even if some of the parent nodes have not been fully executed. This option is particularly useful in situations where completing all parent nodes is not critical.
Note that child nodes will only use one parent node during execution. This node must meet all conditions, be successfully completed, and have the highest priority.
Configuring the Condition tab
The Condition tab allows you to prescribe conditions for the execution of child nodes:
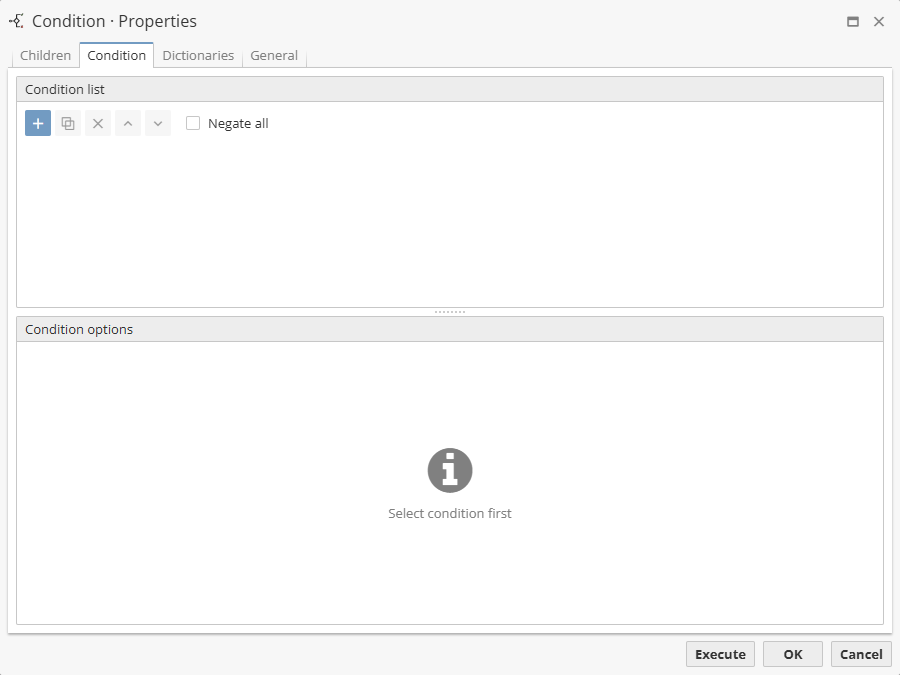
To add, clone, or delete conditions, use the toolbar with the corresponding buttons:
-
Add – allows users to add new conditions to the list.
-
Clone – allows users to copy existing conditions. The option is enabled only after you select one of the conditions from the list.
-
Remove – allows users to delete conditions. The option is enabled only after you select one of the conditions from the list.
-
Move up/Move down – allows users to navigate through the list of conditions and change their position within the (sub)folder. The buttons are enabled only after you select one of the conditions from the list.
The name of the condition is generated from its settings, so the user can click on it as a single object.
The Negate all option allows you to invert the result of the calculation: the calculated logical value is reversed, true will become false, and false will become true.
When adding multiple conditions, use the logical operators And/AndNot/Or. Select the required operator from the drop-down list on the left.
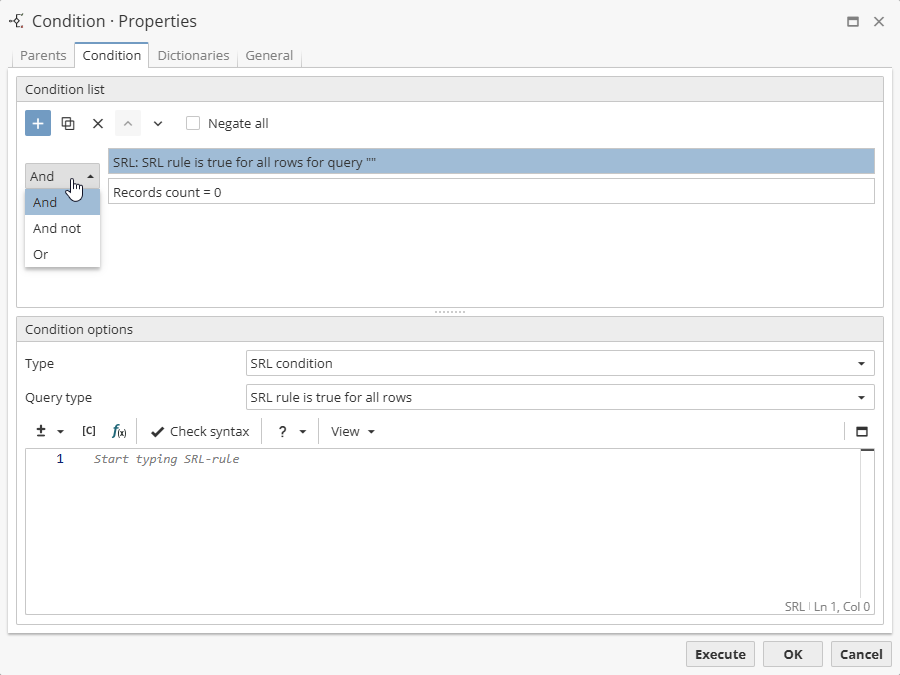
To manage condition settings, click on the required condition so that its parameters are displayed in the Condition options area.
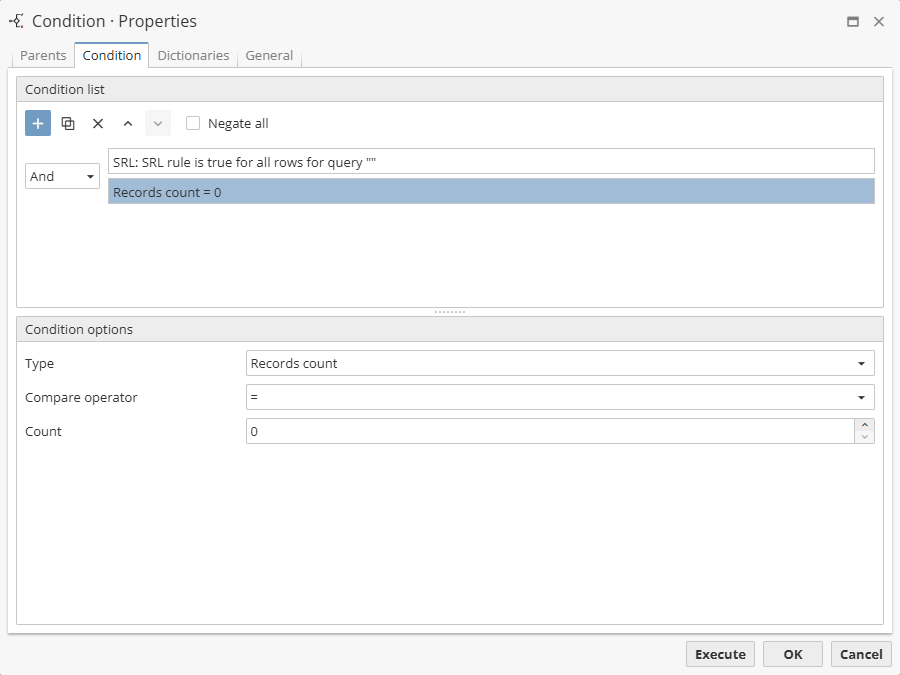
The Condition options field allows users to specify сonfigurable parameters for different types of conditions.

There are following conditions available: