An introduction to executing nodes
Executing a node instructs PolyAnalyst to perform the node’s task (i.e., to carry out the node’s intended function). For example, when you execute a node that is configured to import a spreadsheet, PolyAnalyst will access the spreadsheet file, scan its contents, and save the contents as the output of the node within your project in PolyAnalyst.
About node output
When a node completes its task, such as when a data source node finishes importing data, PolyAnalyst will save the imported data as the results of the node within your project. The results of executing a node are called the node’s output. To view the results of nodes, you do not need to execute the nodes again. The results of nodes that have completed execution are saved within the project.
A node’s results are also referred to as the node’s output, object, cache, or view.
Nodes with results do not need to be executed again in order to view the results.
Each node in PolyAnalyst has a distinct purpose, such as importing a certain type of data or training a certain type of model. However, nodes with different purposes can still produce the same type of output. Even though one node’s purpose may be to import a table of data, and another node’s purpose may be to filter some records from a table of data, both of the nodes produce a dataset as output.
Most nodes produce output in the form of a dataset. In general, the types of results produced by nodes are as follows:
-
Datasets
-
Models
-
Charts
-
Reports
There are a few other types of output that are discussed in separate topics of this documentation that are outside the scope of this user manual.
We will next discuss how to generate a dataset in PolyAnalyst.
Every time you execute a node that already produced results, PolyAnalyst replaces those results. Executing a node for the first time generates and saves the results of the node. You can, at any later point in time, re-execute the same node. Re-executing a node repeats the node’s task.
Every time you re-execute a node, you are replacing any prior results with new results. The previous results are permanently deleted.
| Be aware that results can unexpectedly change when you re-execute a node, despite no change in the node’s configuration. For example, if you are using a CSV Source node to import a CSV file, and you execute the node to generate its output, and then you (or someone else) externally modify the CSV file, and then you re-execute the CSV Source node, the results of the CSV Source node will change to reflect the current state of the CSV file, even though you did not change the node’s properties between the first and second execution of the node. |
How to execute a node
There are multiple ways to execute a node:
-
Right click on the node and select Execute (or Execute to here).
-
Execute a node that precedes your node in a connected sequence of configured nodes.
-
Execute a node that follows your node in a sequence of configured nodes.
-
Setup a schedule within PolyAnalyst that executes the node at a later point in time or as the result of some event.
Whenever you execute a node, you are potentially executing all nodes connected to the node. In this respect, the node from which you choose to initiate execution of a sequence is arbitrary. However, in certain situations, the node you choose changes which nodes in the sequence are executed. This is described in greater detail shortly.
How PolyAnalyst reacts to changes to external data sources
PolyAnalyst does not monitor whether your original data has changed from the time you imported it. For example, PolyAnalyst does not monitor the state of a spreadsheet file saved on your computer and automatically detect if it has changed and automatically import it again. However, you can setup a schedule that executes the node periodically to ensure that the data is up to date.
How to execute one or more nodes
You can execute an entire sequence of connected nodes by choosing to execute the first node in the sequence, which will also cause all other executable nodes in the sequence to execute.
-
To execute a node, right click on the node on the flowchart or in the project tree and select Execute. Alternatively, open the properties of the node and click the Execute button in the bottom right corner of the properties window. PolyAnalyst can alternatively be configured so that double clicking a node on the flowchart initiates execution.
-
PolyAnalyst may present a prompt at this point asking you to confirm whether you want to execute the node. Because executing a node generally replaces its results - and because all downstream nodes are also generally affected by the decision to execute the node (in that the results of those nodes are also recreated) - you will need to confirm the action.
-
PolyAnalyst will then verify whether the node can be executed. A node cannot be executed if it requires input data (i.e., an incoming connection from another node) that is not currently available. A node also cannot be executed if it is not properly configured.
-
PolyAnalyst may determine that other nodes must be executed first in order to execute the node. In this case, PolyAnalyst returns to step 2 for any other nodes that must be executed, executes them, and if successful, continues to the present node and the next step.
-
PolyAnalyst begins executing the node.
-
When a node starts executing, PolyAnalyst displays a task in the task list.
-
When execution completes, PolyAnalyst may decide to continue on to other nodes in the sequence and execute them as well. If you want execution to stop at the node you clicked to execute, then next time, choose the Execute to here option instead of the Execute option.
-
Project execution completes when all of the nodes complete execution.
Additional methods of executing nodes
-
Right-click anywhere in an empty space on the script and select Execute. This method will execute all nodes within the project. Unlike the normal targeted method of executing nodes, this method re-executes all nodes, which includes those nodes that have already been executed. In other words, the Execute option in the File menu is global to the project. This is helpful when you are working with large flowcharts consisting of multiple sequences of nodes where individually executing separate nodes in separate sequences is cumbersome.
-
Right-click anywhere in an empty space on the script and elect Continue execution. This method will execute all nodes that can be executed. This essentially corresponds to any nodes within the ready state (the yellow state). This is similarly helpful when you are working with more complex flowcharts and would prefer to execute all possible nodes rather than search for the specific nodes to execute, but when you specifically want to avoid re-executing those nodes that have already completed processing.
Execute the CSV Source node
Try right clicking on the CSV Source node we created in a previous step and select Execute.
If you did not properly configure the node, you will not be able to execute it.
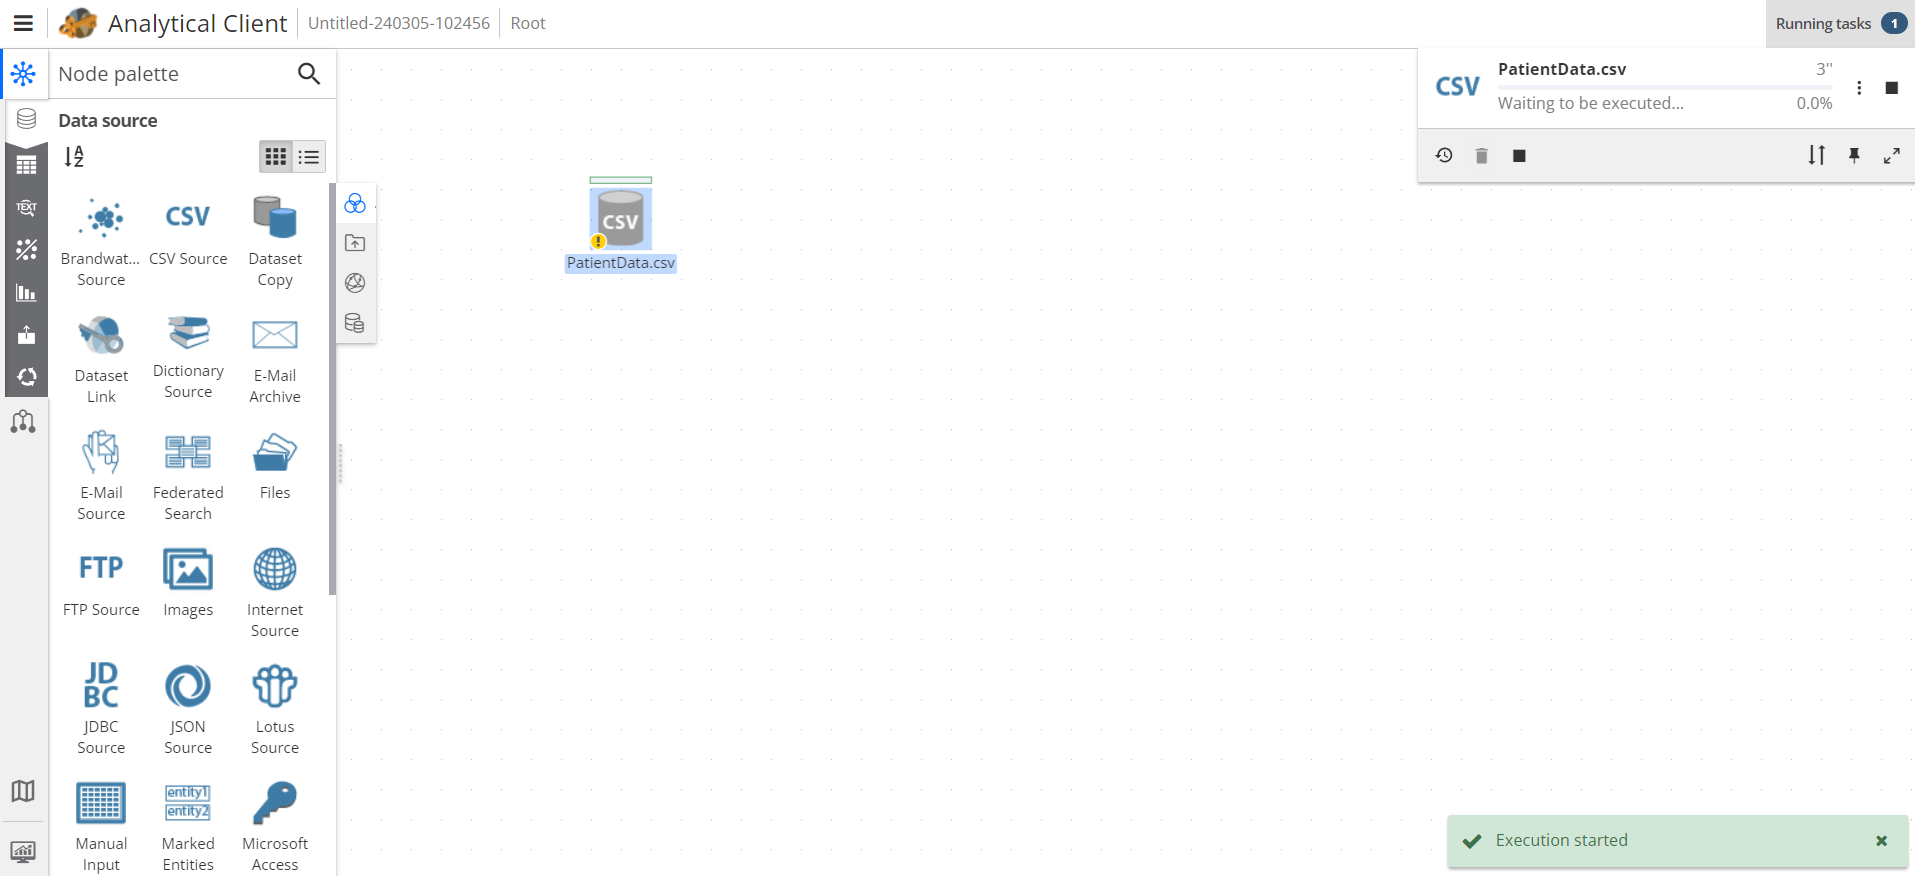
If the node is configured properly, PolyAnalyst will start executing the node. The "Execution started" message will appear in the lower right corner. At this time, information about the number of current tasks running at the moment will appear in the upper right corner. Click on the number of current tasks to expand the task list with information about the node’s completion rate. When the task completes, the task is removed from the task list.
You may not see a task appear in the Task List if the task completes very quickly. The Task List refreshes every few seconds. Sometimes a task both starts and completes in between refreshes.
If an error has occurred, the task may remain present in the task list and show an error message.
While executing the CSV Source node in this example, PolyAnalyst does the following:
-
Creates an empty dataset.
-
Opens the PatientData.csv file.
-
Progresses through the contents of the file line by line and stores the values as new records in a new output dataset.
When execution completes, the node’s icon now shows a small green checkmark in the lower left corner. This indicates that the node has completed execution, and you can now view its results. Viewing node results is discussed in a later section.
An overview of the Task list
PolyAnalyst is designed to perform data processing operations that may require several hours or days to complete. While a node is executing, you can monitor its progress using the Task list panel in the Analytical client window.
In the following image, the Task list shows that PolyAnalyst is processing a single task.
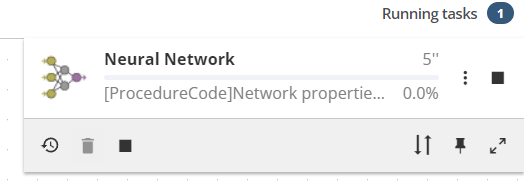
The Task list may display several tasks because PolyAnalyst can execute more than one node at a time.
Displaying tasks started by all users
By default, PolyAnalyst only shows you the currently executing tasks in your own project in the Task list. However, this is not always an accurate representation of what is occurring within PolyAnalyst Server. Other users can simultaneously execute nodes in their own projects.
To view all tasks, regardless of whether you or another user is executing those tasks in the same or a different project, see the topic on monitoring server performance using the Administrative Tool. This requires administrative privileges.
Measuring the progress of tasks
Tasks progress at different speeds. The progress of some tasks is difficult for PolyAnalyst to measure accurately.
For basic tasks, measuring progress is a straightforward calculation such as counting how many steps have been performed out of how many steps in total must be performed. For other types of tasks, such as when training certain statistical models, PolyAnalyst can only provide a rough estimate, or no estimate at all.
Several of the nodes documented in the Node Reference section of this user manual provide more detailed descriptions of how progress is measured when the measurement is non-trivial.
PolyAnalyst is unable to measure of the progress of certain nodes. For these nodes, the progress displayed in the Task list may appear "frozen" at 0% or 99% until the node completes execution.
Stopping tasks
You can stop tasks at any time before they complete. To stop a running task, click the Stop task button in the toolbar. This button is enabled in the toolbar only after a task starts executing.
Clicking Stop all stops all of a project’s tasks.
Node execution errors
There are four outcomes that can result from executing a node:
-
The node executed successfully without any errors. You can view the results of the node and use the node’s output as input to other nodes.
-
The node executed successfully but with non-fatal errors. You can view the results of the node and use the node’s output as input to other nodes. However, you should at least be aware that something unexpected occurred.
-
The node failed to execute due to a fatal error. You cannot view the results of the node and cannot use the node’s output.
-
A serious problem occurred with PolyAnalyst Server while the node was executing. You will need to restart PolyAnalyst Server and/or consider contacting Megaputer support.
A non-fatal error refers to an issue that PolyAnalyst knows how to resolve. Non-fatal errors do not stop a node from completing execution. For example, when PolyAnalyst encounters an invalid CSV value when importing a CSV file, PolyAnalyst skips past the value rather than failing to complete the import.
In the event of a non-fatal error, the node’s icon on the flowchart displays a small warning symbol in its top right corner. The symbol has a tooltip. In addition, the task list does not immediately remove the completed task. Instead, the task list shows that the node completed execution but with non-fatal errors. In addition, the node may provide additional options for reviewing the non-fatal errors. For example, you might see a Display error description or View log option in the node’s right click menu.
In contrast to non-fatal errors, fatal errors occur when PolyAnalyst encounters a problem that it cannot ignore. For example, a fatal error would occur when another program simultaneously deletes the CSV file as PolyAnalyst is importing the file. When encountering a fatal error, PolyAnalyst may display a large red X over the node’s icon on the flowchart. In addition, the task in the task list that corresponded to the node where the error occurred may display a message in the task’s Details field about the error.
Configuring how PolyAnalyst should react to execution errors when simultaneously executing more than one independent node
You can customize how PolyAnalyst reacts to an error occurring when processing several nodes in a flowchart where two or more nodes are executing independently of one another. For example, a process that is importing data suddenly becomes unable to continue the import (e.g., the external data was deleted or changed in the midst of the import). PolyAnalyst can either stop executing all of the nodes in the currently open project, or it can continue executing those nodes that can still execute independently of the error.
To configure PolyAnalyst to stop executing all nodes when any one node encounters an error:
-
Select Project settings… in the menu.
-
Switch to the Execution section.
-
Check Abort on first error.
-
Click OK or Apply.